So, you’ve got your hands on your Picture Perfect DTF Prints and it’s now time to press them on. Read on below for all the tips and tricks to make sure you get Picture Perfect Results! 👇
🔥 How to Press Warm Peel DTF Transfers — Step by Step! 👕✨
Warm Peel DTF Transfers are perfect when you want speed and efficiency without sacrificing great results! Follow these simple steps to achieve bold, durable prints every time.
NOTE: The Step by Step guide below assumes you’re pressing onto a plain, 100% Cotton T-Shirt. For other materials, see the Times & Temps Table below.
1. Pre-Press Your Garment 👔
- Heat press your blank garment for 3–5 seconds at 140°C.
- This removes moisture and wrinkles, giving you a flat, dry surface to press on.
2. Position Your Transfer 🎯
- Place your DTF transfer film on the garment print side down (so that the white adhesive backing is against the fabric with the film facing up) .
- Use heat-resistant tape if needed to keep it perfectly aligned.
3. Press the Transfer 💪
- Cover your design with parchment paper or a Teflon sheet.
- Temperature: 140°C
- Time: 8-10 seconds
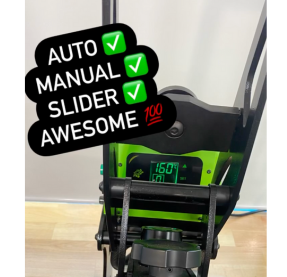
- Pressure: Medium (5-6 Setting on Galaxy Heat Press / 30–40 psi / 3–4 bar)
👉 Keep the press flat and even for best adhesion.
4. Peel While Warm 🔥
- After you lift the press, wait about 5 seconds and then peel the film using a smooth and steady motion from one corner.
- If your design has fine elements, allow the transfer to cool a little longer (30 – 60 seconds) before peeling to minimise the risk of these fine details lifting when you peel.
- For thin lines, try to peel along the length of the line, not across it.
5. Post-Press for Perfection 🌟
- Cover your design with parchment or a Teflon sheet.
- Press again for 8-10 seconds at the same temperature.
- This gives your print a soft feel and long-lasting finish.
6. Ready to Rock! 🎉
- Allow the print to set for 24 hours before washing for maximum durability.
👕 Fabric & Garment Settings – Warm Peel
Material Temp Time Pressure Notes Cotton (T-Shirts, Hoodies) 140°C 8-15s (5-6 Setting on Galaxy Heat Press / 30–40 psi / 3–4 bar) Use a slightly higher pressure & time for particularly thick / heavy hoodies Polyester 130–135°C 8–10s (4-5 Setting on Galaxy Heat Press / 30–35 psi / 3 bar) Reduce heat to avoid shine and consider using a soft teflon pressing pillow Elastane / Lycra / Spandex 130°C 8–10s (4-5 Setting on Galaxy Heat Press / 30 psi / 3 bar) Use light pressure and quick press. Make sure the fabric is completely relaxed and not stretched at all. Cotton-Poly Blends 135°C 10–12s (5-6 Setting on Galaxy Heat Press / 30–40 psi / 3–4 bar) Lower temp slightly when compared to 100% Cotton
💡 Pro Tips:
- Let your press fully heat up before starting for consistent results.
- Peel confidently — hesitating can cause lifting.
- Avoid stretching the print until it’s fully cooled and set.
- Always test on a spare piece of fabric before your first production run!
🎉 Ready to level up your custom merch and wear game?
DTF printing is faster, easier, more colorful, and way more fun. Whether you’re a side hustler, full-time maker, or just DTF-curious (we had to 😄), you’re going to love what this method can do.
👉 Check out our Custom DTF Print Service to get your own design printed, or grab some of our Pre-Printed DTF Transfers and get started!